Articles
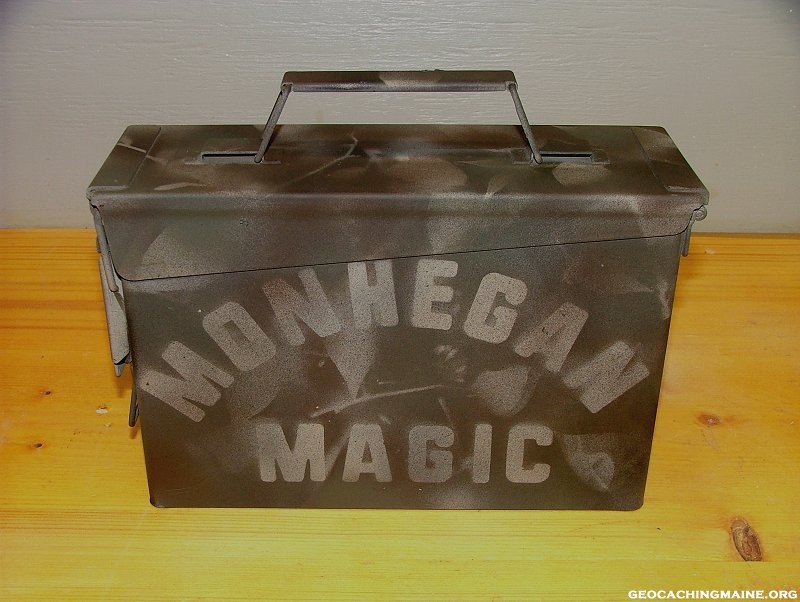
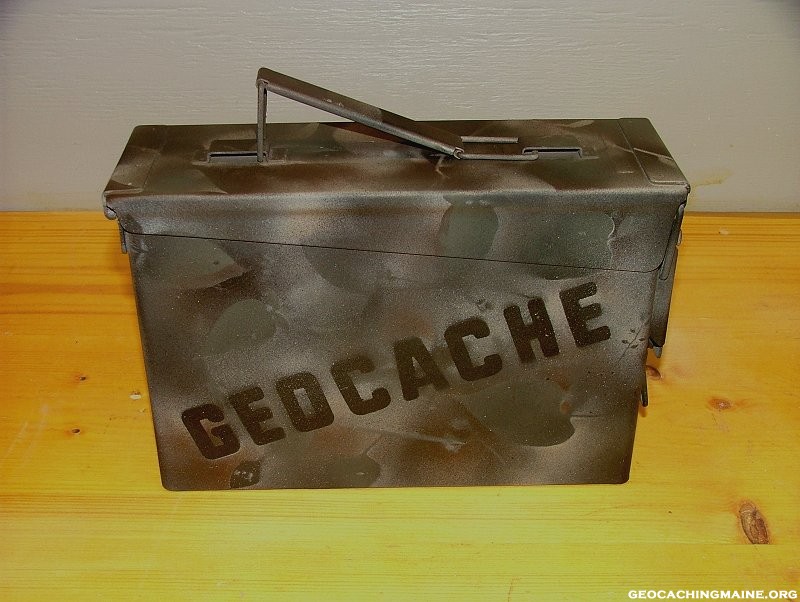
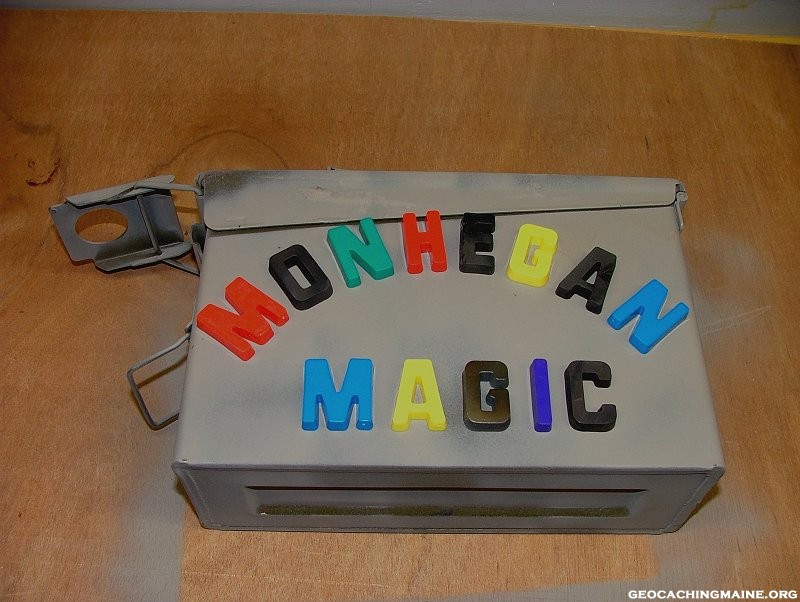
The following is one way of camouflaging ammo boxes. The technique could also be adapted for used on Tupperware or other cache containers. This particular project is a .30 caliber ammo box I painted in a hurry for a possible replacement for the Monhegan Magic cache, which is in need of repair. If I knew where the box was going, I might try to adjust the camouflage to match the surroundings, but having never been there, I just did a basic camo job, and painted the name of the cache on one side of the box and the word Geocache on the other.
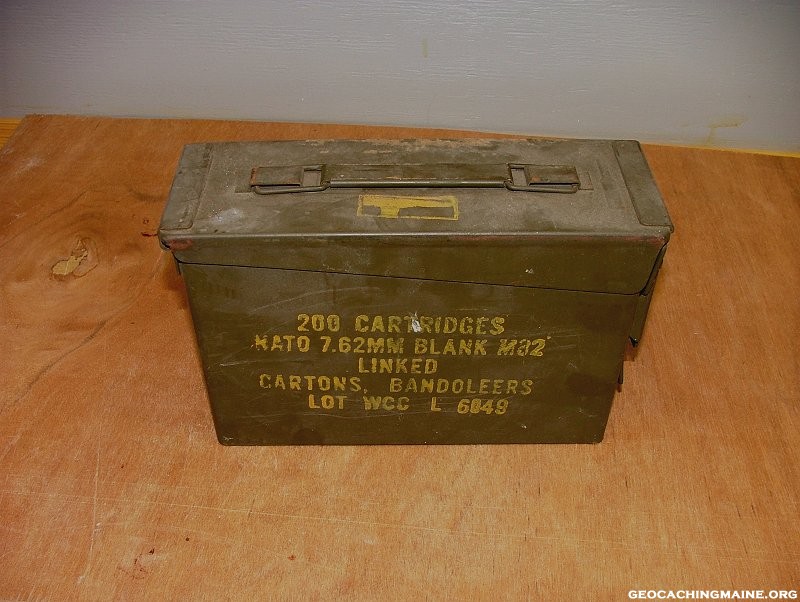
The typical used ammo box we purchase generally is dirty and covered with oils and other chemicals. I usually start with cleaning the inside with a little household cleaner. The outside, I wipe down with paper towels and nail polish remover (acetone). This often removes any yellow text on the box, but it will only soften the green paint, removing any oils and eliminating the need to use any primer and ensure great adhesion of the new paint.
I get most of my camo spray paint right at Wally-World, but other places have it as well. It is cheap and works well. It gives a nice flat finish and comes in several natural colors. I usually use a little of each color. The words are reverse stencils, meaning you place the letters and then paint around them, leaving the letters the background color when the stencils are removed. For ammo boxes, the plastic letters little kids use to make words on the refrigerator work great. They are magnetic so they stay in place on the ammo can and can be purchased for little cost.
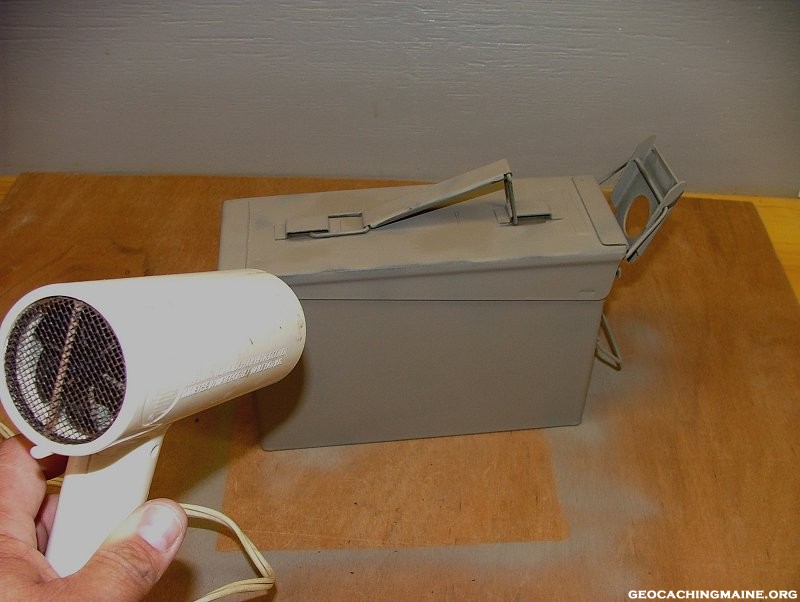
Paint the base coat on the box the color you want the letters. On this project, I painted the side with the cache name a tan color, and the side with the word Geocache black. Camo paint dries quickly, but if you get impatient, you can speed up the process a little by using a blow dryer on the cool setting. The paint does not need to be fully dry to proceed to the next step, just dry enough so you can handle it.
Now it is time to add the text. Add these as you like; it is purely user preference.
Now, go out in your back yard and pick some weeds, or if your fiancé is away for a few hours, pick some greenery from the flower garden. Since I am in the city, I chose the latter. Plants that will set flat work best, ferns are great. Most anything will do, even tall grass clippings. Lay the plants on the box in an arrangement that suits you. More is usually better as a few will blow around a little while painting unless they are large enough or you attach them somehow.
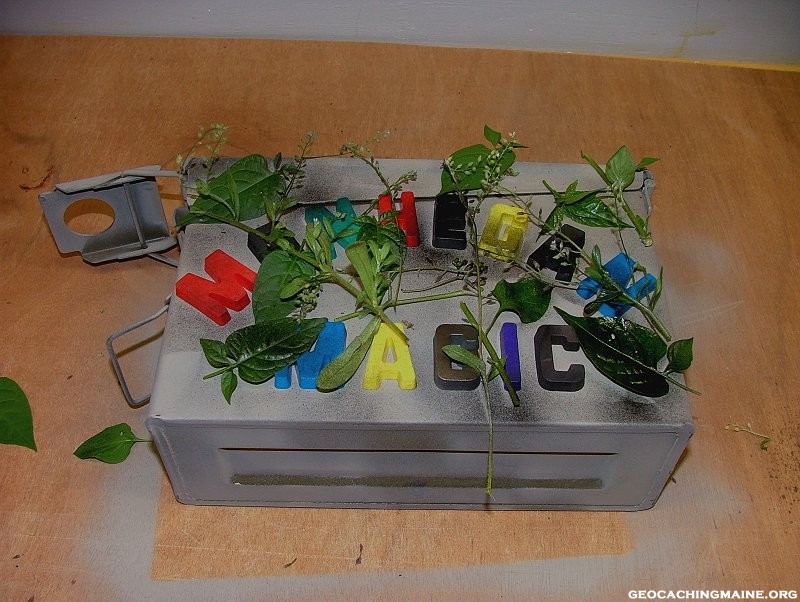
Paint over the entire arrangement by using different colors and just dotting them on, dont try to be consistent. A spot here, a line here, a different color there. Keep layering until you get the effect you want.
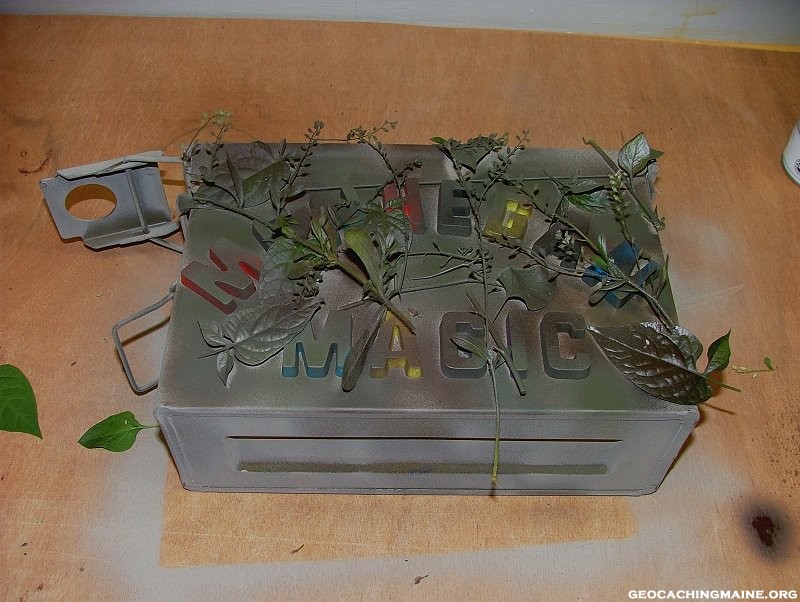
Remove the plants and enjoy what you have done so far! Repeat this process for the other sides, as well as the top and bottom. A little over spray from one side will make the camo effect better on an adjacent side.
At this point I like to spray a few splotches over the entire box in a random manner to give it some extra camo effect. This technique will also lessen the contrast between the text and the rest of the paint. Go slowly and stop when reach your desired effect.
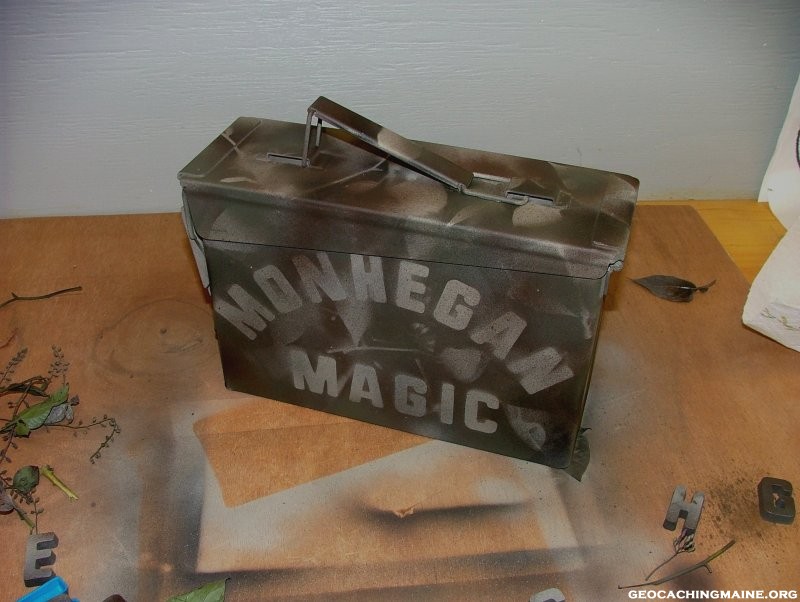
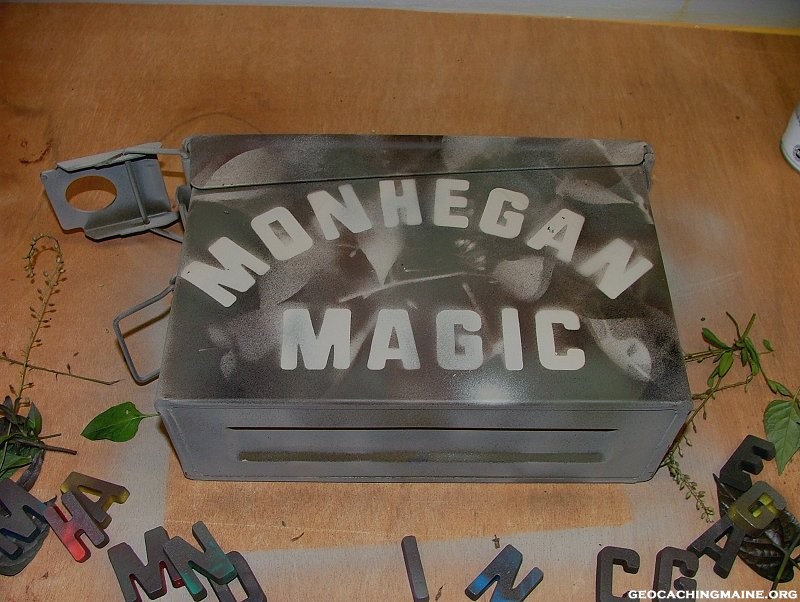
Let the box sit for a few hours to fully dry before placing it to ensure the paint has fully set. Below are pics of the finished product, showing both sides to show the difference light or dark background makes.